< Back to blog home

Nov 08 2019 0 Comments

vape coil gunk

How to
Avoid Coil Gunk?

Several people end up changing their coil and throwing away their money because of a bad buildup of gunk on their coils. Vape coils are the key to converting e-liquid to vapor. Thus, gunk buildup on a coil will result in a bitter, less enjoyable and harsh vaping experience. So you might be asking, how can I stop my coil from building up gunk?

We obviously don’t recommend peoples first instinct and the simplest fix which is to replace the coil altogether. This can become a very costly solution. The alternative is to clean the coil. Would you like to know how to clean a vape coil? The current post will enlighten you and help you find the best way to get rid of coil gunk so that you can increase the life of your coil and save a few bucks along the way.

The current post covers important topics one must know about coil gunk buildup and the ways to prevent it.

What is Coil Gunk?

Coil gunk is the residual e-liquid that the coil doesn’t vaporize properly. It includes flavors, sweeteners and other components of the e-liquid. It forms on the atomizer coil and these residual sections stick to the coil and with time they become thick and dark. Coil gunk discolors the wick as well. Further, the crust layers become thicker and stops the vaper from experiencing the actual taste of the e-liquid they are using.

Awesome flavor is of critical importance to the average vape enthusiast. Improper flavor generation will have an impact on your experience and you’ll question why you paid for that e-juice that before was so tasty. While you vape the gunk burns releasing a very bitter flavor into your vapor. Cleaning the coil can surely restore some amount of performance, though it will never perform like a new one. If you’re here to learn how to clean coils this post will provide you all the answers. Keep reading.

Prevent gunk to save a few bucks on the coils

There are two solutions for the buildup of gunk on a coil. It’s important to make the necessary changes to stop coil gunk from forming in the first place. The other is slowing down the coil gunk formation once it’s begun.

What are the reasons for coil gunk?

Sweetness in e-liquids cause coil gunk

Flavor plays an important role in a satisfactory vaping experience. Vapers like sweet e-juices such as dessert and fruit flavors. Nowadays, most vapers prefer sweet e-liquids compared to a few years back. For this reason, coil gunk issues have increased significantly.

Sweet e-liquids causes much more coil gunk. The sucralose doesn’t vaporize and It caramelizes and continues to burn to give you a burnt coil.

Switching to a non-sweetened liquid is an easy way to avoid coil gunk. It will allow your coil to last for days instead of hours. Finding a non-sweet e-liquid can be a challenge as most of the e-liquid manufactures with wide-scale distribution manufacture sweet juices. Because of wide-scale distribution, the sweet e-liquids are much less costly compared to the non-sweeten juices.

Thus, avoiding an artificial sweetener can help to get rid of coil gunk but it may end costing you more in the long run as well.

High wattage vaping

Sweetener liquid causes coil gunk but does it mean that people won’t use them? No, but it does not mean that Sweet e-liquid isn’t a major reason behind coil gunk.

Using bigger sub-ohm tanks at a high wattage can also be a reason for coil gunk. You may get the same burnt taste vape a few hours after changing your coil in your box mods because of a high wattage setting. So shifting to a lower wattage device will consume less e-liquid without compromising your nicotine hit or Vaping experience. Additionally, it will not give you a burnt coil.

Reports suggest that several experienced vapers are switching to low wattage devices. Avoiding coil gunk is a reason behind such a switch. A device producing less vapor often helps in increasing the life of the coil. Additionally, you can still thoroughly enjoy sweet e-liquids just by enhancing nicotine strength to a certain level to compensate for less wattage output.

high wattage vaping

Chain Vaping

Another reason for coil gunk is chain vaping. Vaping too frequently can cause damage to the wick, which ultimately results in the formation of coil gunk. You can spot frequent vaping if the vaper is using an RBA.

One needs to access the wick with a tweezer to see if it breaks easily or not. If it breaks easily, this means the vaper vapes frequently. Further, one can spot black spots on the wick that stays under the coil. It happens because coil is saturated with the coil gunk.

Chain vaping often can be satisfying and provide a strong nicotine hit, but for the sake of the coil, avoid it.

Poor filtration of tobacco extracts

Vapers’ quest for original tobacco goes back to the inception of vaping. They have used several ways to capture real tobacco flavor. Directly using tobacco extracts is a way to get better flavor. However, tobacco extracts differ in taste compared to cigarettes.

However, companies nowadays use more advanced methods to extract the flavor from tobacco leaves. Facing an “ashtray” note seems common while using NET e-liquid. It happens because of the use of tobacco solids.

The tobacco solids do not vaporize. Thus, it forms gunk quickly. In case of facing frequent coil gunk using NET e-liquid, you must consider other brands of NET e-liquid. Generally, using the branded NET e-liquids helps avoid the filtration issue.

High VG E-liquids

Reports suggest that liquids with a higher VG capacity generally result in high coil gunk formation. Selecting the right vape e-juice is another important parameter for avoiding coil gunk. The PG based liquids generally form a lesser amount of coil gunk. When using a sub-ohm tank, you must never switch to a high PG based juice. A low VG juice will give you dry hits.

To overcome this issue, you can consider trying a 50/50 blend of VG/PG. It surely increases the lifespan of the coil.

pg and vg vape e-juice

Flavored E-liquid

Most of the flavored e-liquids contribute to the forming of coil gunk. If you do not believe, you can try by yourself. Compare both the flavored and unflavored e-liquid together to compare which one helps the coil last long.

Vaping an unflavored e-liquid is no doubt a matter of disgust, especially for those who are addicted to flavored e-juices. However, several vapers are there who like unflavored e-liquids solely for avoiding coil gunk, health reasons or as they prefer neutral flavor profiles.

Unflavored juice is not tasteless. Because of the added VG (vegetable glycerin), it tastes a little sweet. When you use the same coil three or more times, you will realize the usefulness of the flavorless e-liquid.

This section predominantly discusses the reasons behind coil gunk. The following section discusses ways to prevent coil gunk.

How to clean & fix a burnt coil?

The above section discusses the reasons behind the coil gunk. Knowing ways to stop the coil gunk is important.

From the discussion, you must consider the following to remove coil gunk.

  • Using an e-liquid without added sweeteners
  • Using low wattage devices generating less vapor
  • Try to use clear liquids from reputed sellers
  • Avoid using NET e-liquids giving ashtray taste as these contain unfiltered matters
  • Unflavored juices reduce the coil gunk issues
  • Use e-liquids with low VG

Performing these points is tough. Vapers are generally passionate about their devices and e-liquids. Changing habits altogether is difficult.

So, what do you do?

How to stop coil gunk without changing e-liquid?

Performing the suggestions all together is extremely challenging. If you love your e-liquid or flavor, switching to a new liquid to prevent coil gunk is not a fun factor at all.

So, assuming you do not want to change the existing setup but want to get rid of coil gunk. For that, consider the following related to coil gunk and sub-ohm tanks.

A thorough cleaning to remove the coil gunk

A thorough cleaning at a regular interval helps to remove coil gunk. Placing the coil head with the gunk under running water or dipping it in hot water helps to remove the gunk from the coil. You may also use rubbing alcohol to help remove coil gunk.

Let the coil sit in the container for at least one day. You can use your backup coils during that time. After the coil is soaked fully, let the coil dry out for another whole day. If you are soaking the coil in alcohol, rinse the coil first.

It’s difficult to get rid of all the gunk traces without disassembling the coil during cleaning. However, cleaning the coil will not help you fix the burned cotton. A thorough cleaning allows more vaping throughout the day with your coil.

Go for an RBA

As you do not want to change the liquid, switch to rebuildable atomizers. E-liquid is the fundamental reason behind the coil gunk. Generally, a prebuilt coil for tanks would cost $2-$3 each. If you replace a coil every two days and run through 10-15ml of liquid, the cost incurs more.

Switching to a rebuildable atomizer will cut the cost significantly. It reduces the coil costs from a few dollars to a few cents only. Rebuildable atomizers are easy to clean and re-build. Further, it is easy to get rid of the coil gunk in RBAs. Rebuilding the coil is time consuming, but it saves you a lot of money.

Switching to RBAs will not end the coil gunk issue. Rather, RBAs generate more vapor than sub-ohm tanks, so the coil gunk will be excessive. Cleaning coil gunk is easier for RBAs than other devices which to most of its fans is the best part of using it.

Better disassemble Atomizer Coil

Cleaning the atomizer in an assembled condition may not give you all the traces of gunk. Thus, disassemble the atomizer coil for a better cleaning result.

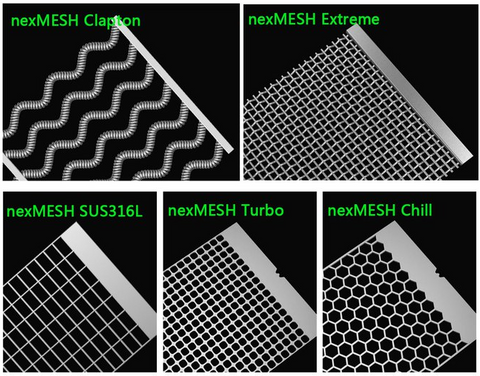
Look at the atomizer carefully to identify the ways to disassemble it. You need to remove the mesh screen with the help of a pair of needle-nose pliers if it covers the wick and heating wire. Remember, this screen forbids the spitting, thus removing it may cause some spitting.

Most of the modern coils are built of several individual coils, which makes cleaning a real tough task. You can use a nylon brush for gently scrubbing the inner coil portion after soaking it in water or alcohol.

Liquid Cleaning

Cleaning with Liquid is the best way to go for cleaning vape coils, especially coil gunk. Liquid de-gunk’s the coil with no side effects. Remove the wick from the coil, unscrew it, and drop it in a hot water container. You can see the gunk starting to fall off from the coil after a few minutes. Use a brush or use a cotton swab to rub the coil for a better result.

Cleaning the coil separately becomes a little difficult if you’re trying to maintain a clean coil all the time. Without a doubt, one can dunk the entire atomizer base, coils, build a deck and all in the liquid. Be careful about metals like copper though, it will discolor quickly.

You can use grain alcohol or soda water as a liquid substitute for regular water. Alcohol is acceptable widely as one of the best solutions to clean coil gunk. The carbonation in soda also provides a deep coil cleaning, too. However, few reports suggest that carbonation in soda may damage the coil.

Therefore, water and alcohol are the best liquid medium available for cleaning the coil.

Dry burn

A dry burn is one of the popular methods to get rid of coil gunk. To dry burn you will press the fire button for a few seconds till the coil glows red. The heat is supposed to burn away the gunk.

You can see a dark carbon layer on the coil after the dry burn. Rub the coil with a wet cotton swab or you can use a brush to get rid of the excess burnt carbon material. Hold the coil under running water to get rid of the gunk that’s left over. Using a fine wire brush, you can remove the leftovers.

However, the dry burn method comes with some downsides as well. A few possibilities have been mentioned here.  

  • During the burn the gunk burns. Vapers inhale the fumes without knowing the implication.
  • Too much heat increases the chance of coil breakage and short circuit. This may damage your mods as well.
  • Overheating may damage the device. So, keep the temperature in control.
  • All the wires do not support dry burn. Thus, dry burns may damage the coil.
  • Titanium, nickel, and Nichrome have potential issues associated with dry burning. Thus, clean the coil in other mentioned ways unless you are using a Kanthal coil.

Thus, you see over here how to clean a vape coil with a dry burn.

clean vape coil with dry burn

Clean every single trace of coil gunk

Dry burn cleans the coil in the most effective way. However, even after cleaning, you may notice a bit of a carbon substance stuck on your coil. Unless you are removing every single trace of the gunk from your coil you won’t be able to achieve the perfect cleaning.

Small carbon particles can lead to gunk much faster than the previous time. Get rid of it by using small wire brushes to sweep away the carbon.

Dip the coil in the water while it is still glowing red. It instantly makes the water boil. Such agitation removes the carbon gunk from the coil.

No matter which method you choose, remember not to press the fire button during this time. Both cases may cause a short circuit or damage the coil.

Before cleaning the coil, place the atomizer on the build deck by removing it from the device.

Agitation is Great for Cleaning Coil Gunk

One can clean the coil by soaking it in the water or alcohol. However, it does not work the way you want all the time.

To get the best cleaning, you can try ultrasonic vape cleaner or jewelry cleaner. No matter what you decide, you will be cleaning the entire coil head or just the heating wire from a pre-built coil head.

Place the coil in a container and the gentle agitation leaves the parts of the atomizer as clean and shiny as a new one.

How to clean vape coil gunk?

Learning how to clean coils is essential to being an efficient vaper and saving a few bucks in the process. The cleaning process of a coil is an essential matter. You must remove the leftovers of the e-liquids with the help of paper towels. You can use any first-hand towel. Then, soak the coil in either of the liquids mentioned above. No matter which liquid you select, the process remains the same.

While cleaning the vape coil builds, keep the coils out of the room at the roof or balcony. The awkward smell will bother you for sure. Soak the coil for at least overnight. Vapers often argue on the soaking time, but keeping it in overnight is plenty.

After soaking the coil overnight, gently pull it out and rinse it under tap water. Then again, rinse in distilled water. Leave the coil to get dried overnight. Before placing it for vaping, check the coil finally for complete dryness.

Changing Wick Material

Vape wick material often contributes to coil gunk formation. If you vape often at a high wattage or constant heat the device, changes the wick material and may cause less coil gunk formation.

Cotton is a widely used wicking material. Cotton is cheap and serves well as the wick material. It generates a high-quality flavor. Cotton rarely stays intact at a high temperature, which is a downside of cotton as wick material. Wotofo Xfiber Cotton is considered the best cotton for vaping removing the downsides of poor quality cotton.

Switching to other wicking materials such as silica, ceramic or stainless steel offers better resistance against a high temperature vaping. However, these materials often cost a little more.

It depends on the vaper to select the right wick material based on their preference for flavor or vapor production.

Re-wicking prebuilt coils

Though the name creates confusion, the truth is that you can rebuild the pre-built coils too. A simple atomizer design allows you a quick rebuilding. You can quickly unwrap the wick from the coil, replace it with a new wick, and assemble the atomizer again.

It is important to ensure that you are returning the coil’s positive and negative leads to their original positions. Generally, one is a little longer than the other. Place the longer one between the pin and insulator and the shorter one between the insulator and the body of the atomizer.

Concluding Words

Coil building is an essential part of vaping. Vapers like to get a perfect vaping session without compromising the flavor or vapor. However, the problem arises when the vapers confronted burned taste caused by coil gunk in their favorite box mods or RBAs.

If you have gone through this whole post, by now you know of the reasons and countermeasures to avoid and stop coil gunk. You also understand how to clean vape coil. This post found the following as the primary reasons behind coil gunk.

Using an e-liquid with added sweeteners, using high wattage devices generating more vapor, using NET poor quality e-liquids giving ashtray taste containing unfiltered matters and using e-liquids with low VG. Those who are new to vaping and yet not developed any preference for an e-liquid can follow these golden rules, avoiding the coil gunk.

However, the pro vapers with preferences in e-liquid may find it difficult to change their e-liquid. The post provides a solution for that too. Cleaning the coil properly eliminates coil gunk and increases the coil life.

This post details the coil cleaning techniques, allowing vapers both new and experienced to clean their coil on their own.

Finally, this post is dedicated to vapers facing bitter taste due to coil gunk.

NEW LAUNCHES FROM WOTOFO

MDura Pro Kit King Kong Black

Sold out
SMRT POD KIT black

Sold out

Sold out

Sold out

LEAVE A COMMENT

0 Comments

Leave a Comment